How to setup AnyIP with ixBrowser
What is AnyIP?AnyIP stands out as one of the top proxy services in 2024 for a variety of compelling reasons. This versatile solution is both cost-effective and robust, offering access to a global network with over 30 million IPs. It supports HTTP/SOCKS5 protocols, integrates seamlessly with all software, and boasts an impressive 98.6% request success rate.
AnyIP specializes in providing clients with premium proxy options, including mobile and residential proxies available worldwide. These proxies cater to a wide range of activities, from data scraping to other online tasks. With extensive industry experience, AnyIP delivers exceptional service, ensuring that clients receive optimal solutions tailored to their specific needs.
At the same time, AnyIP offers a wide array of proxies, including those for Telegram, Instagram, Amazon, mobile devices, and sneaker bots. These options are designed to enhance and secure your browsing experience.
If you want to know more details, please check AnyIP
How to setup AnyIP with ixBrowser?
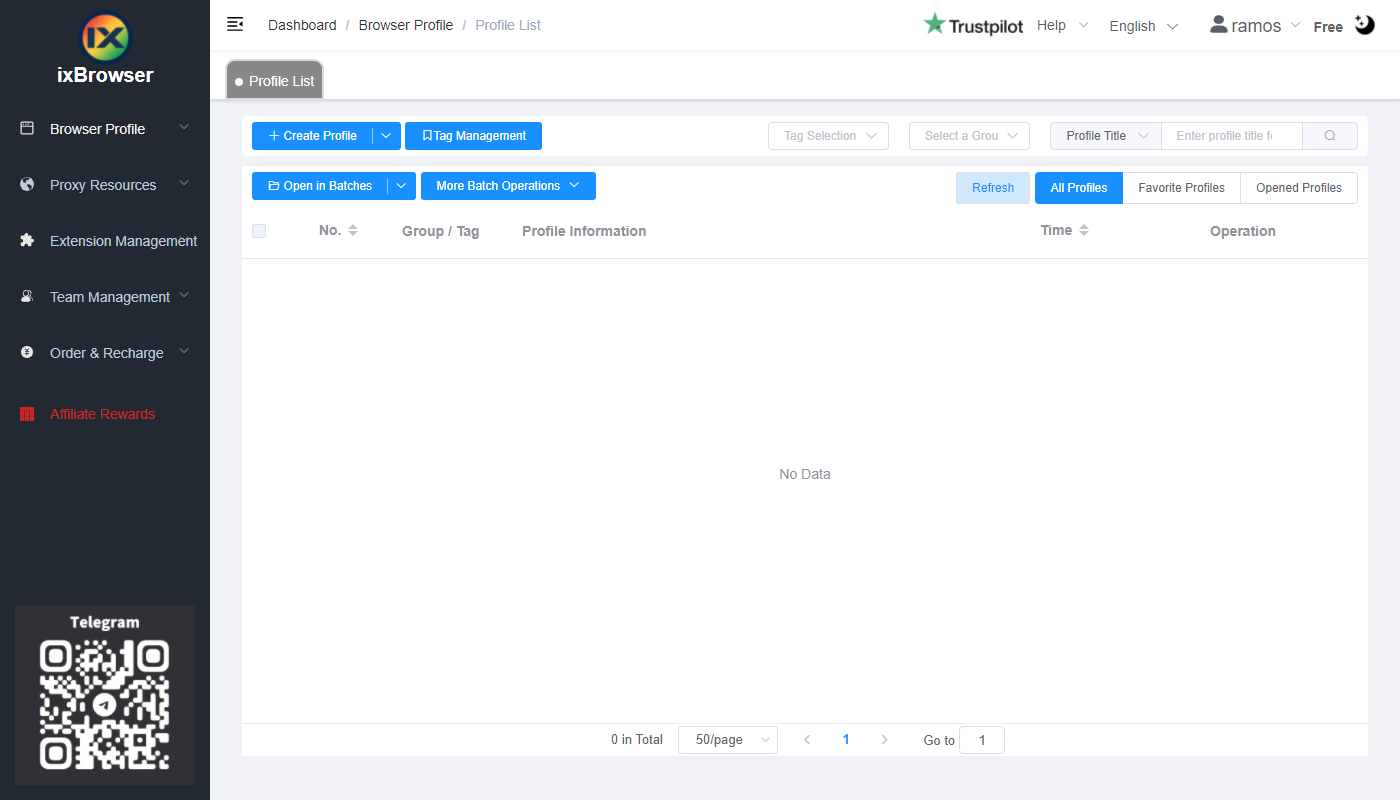
Step 1: register an account, download and log in to ixBrowser;
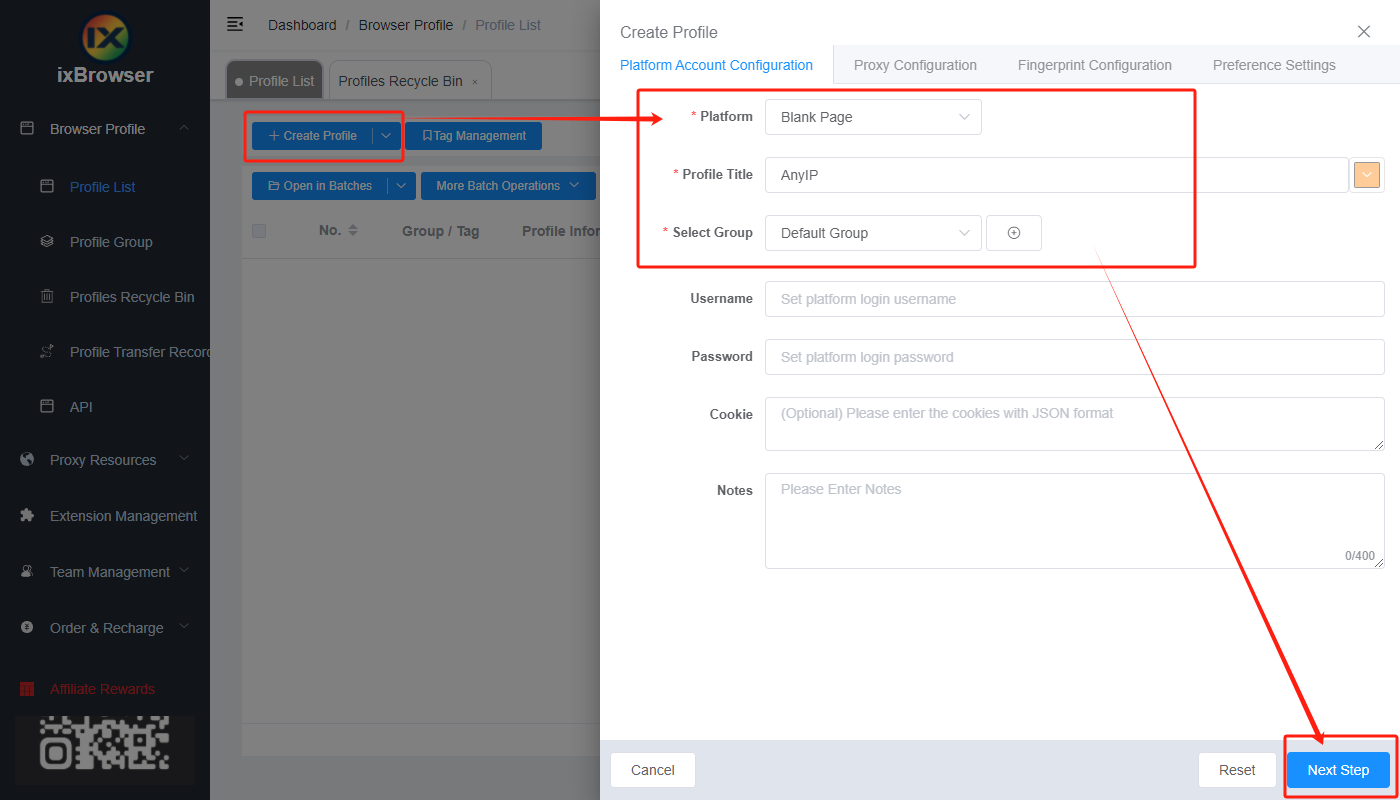
Step 2: click “Create Profile”, select platform and group, enter profile title, and click “Next Step”;
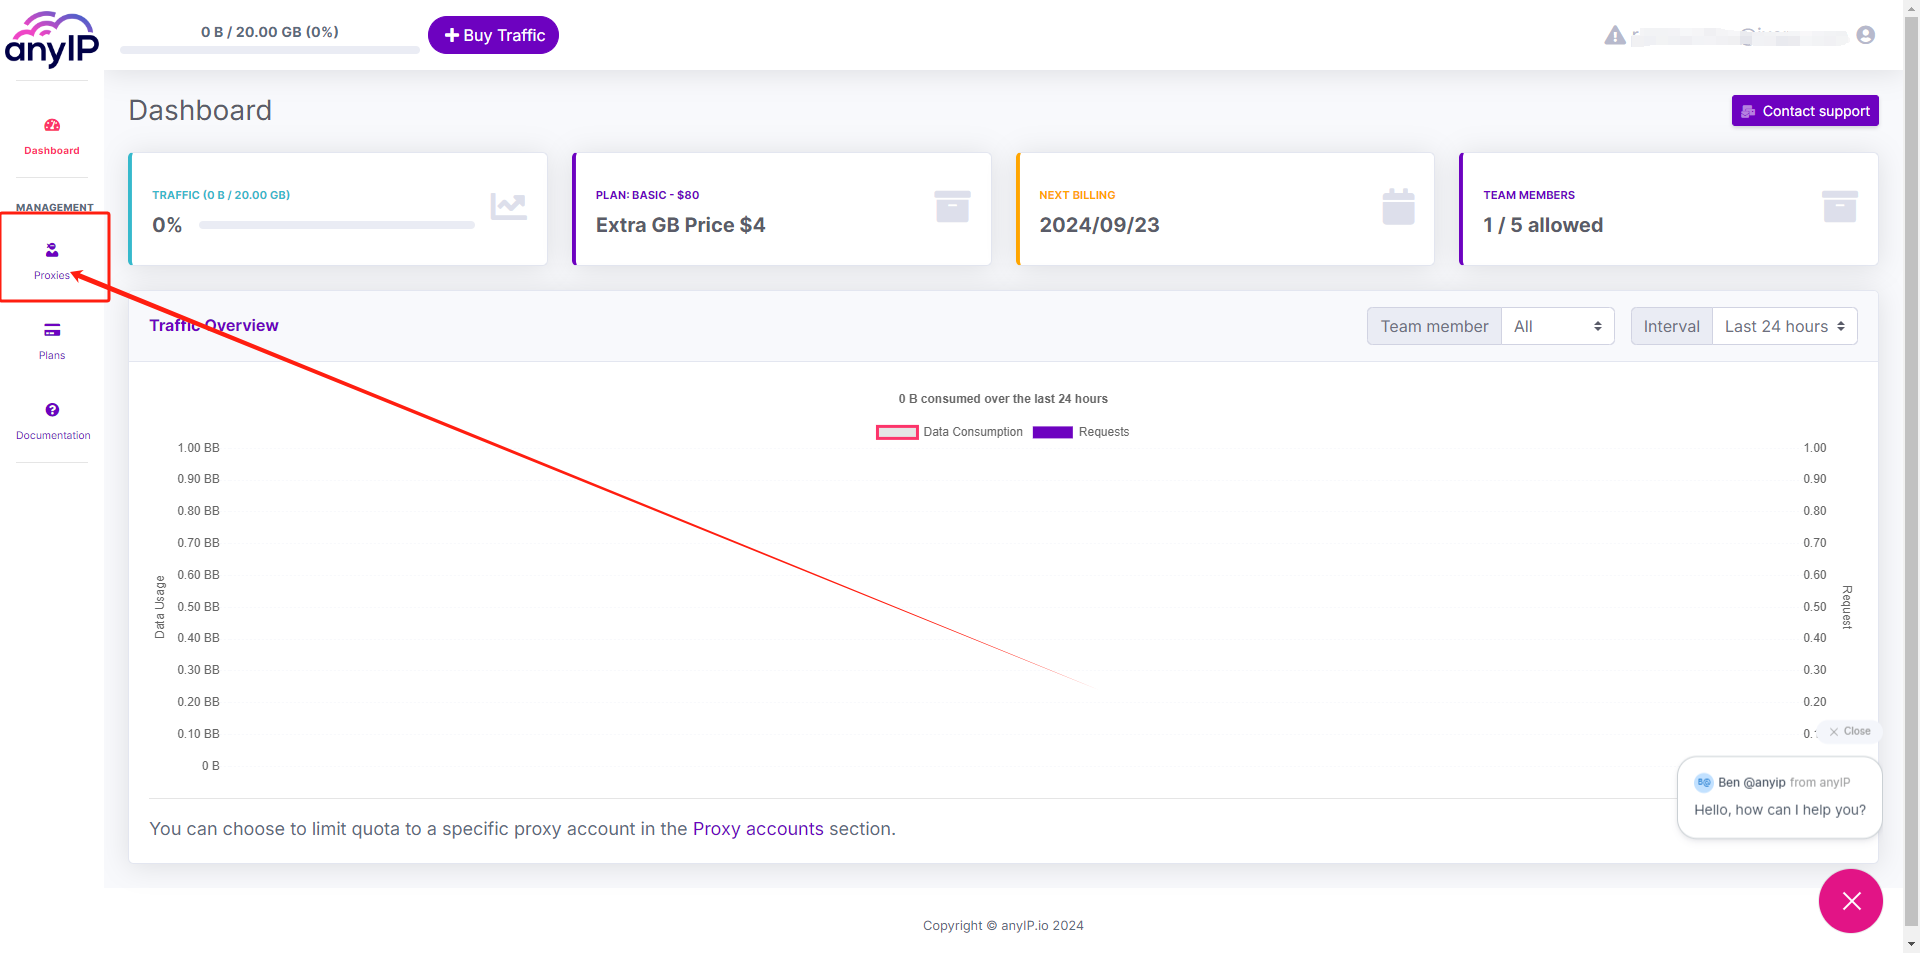
Step 3: before we configure the proxy, we need to first go to AnyIP dashboard to get proxy info;
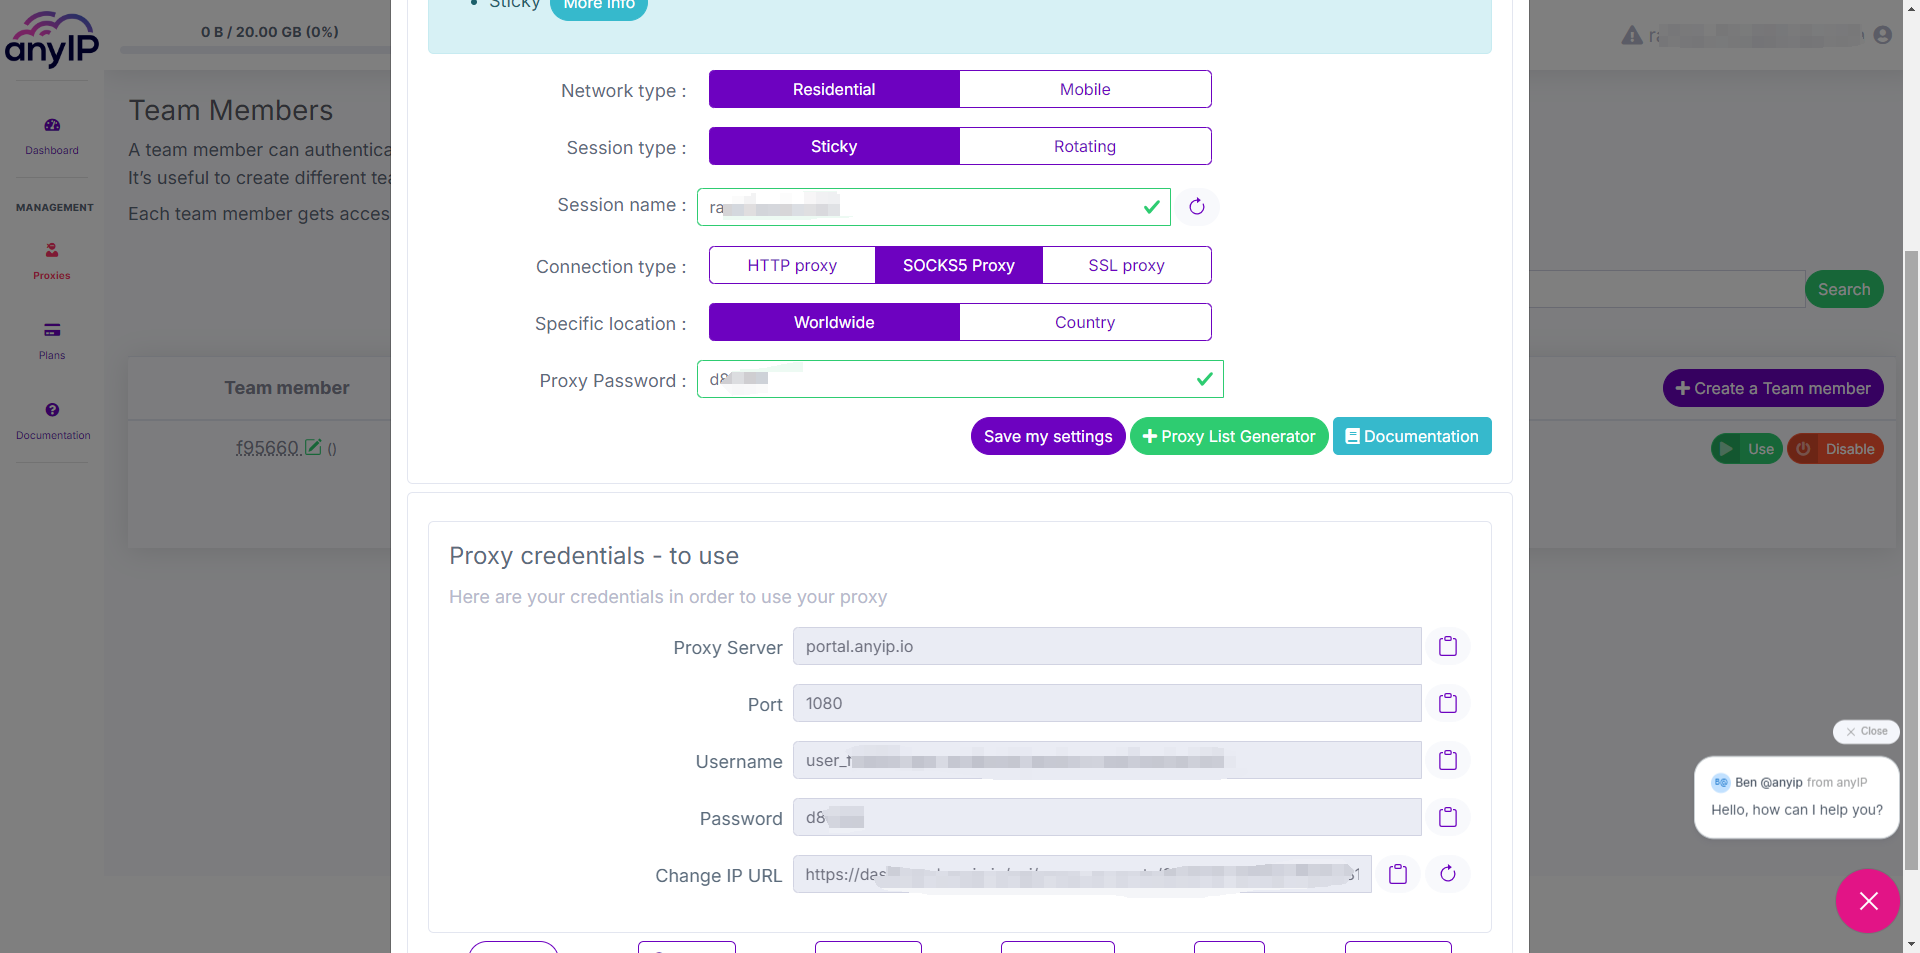
In AnyIP dashboard page, we can click “Proxies” button in the left navigation bar;
Click “Use”, in the pop-up page, you can get the proxy information, you can also set for example Network type, Session type, Session name, and etc. as you want.
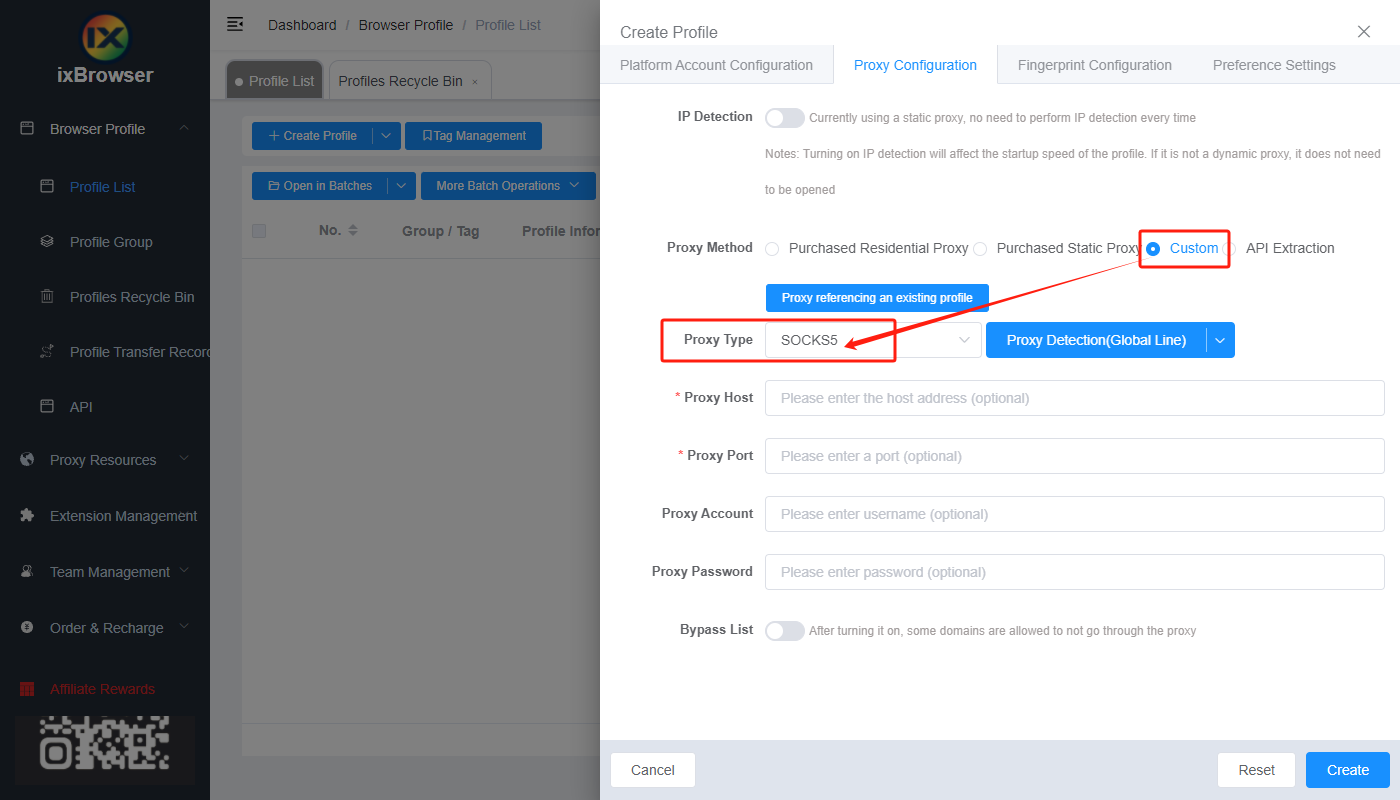
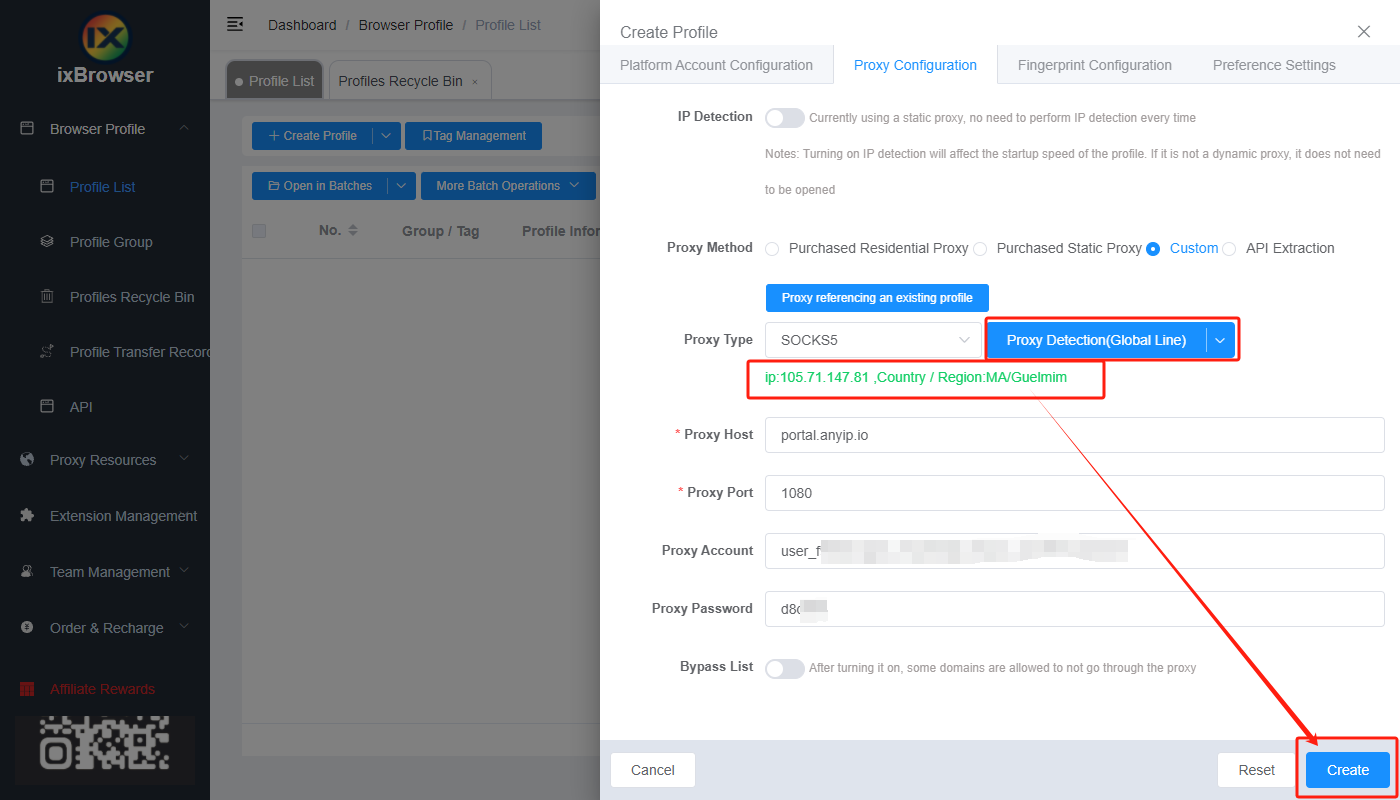
Step 4: now, go back to ixBrowser, in Proxy Configuration page, choose the proxy method to “Custom”, and choose proxy type to Socks5 (you can also select HTTP or SSL, it depends on what connection type you choose in AnyIP)
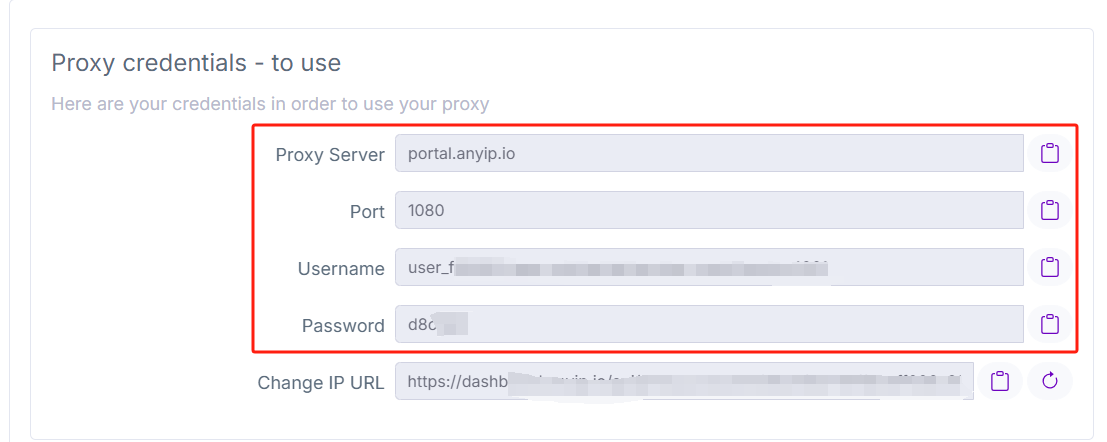
Copy the proxy credentials from AnyIP, and paste it into ixBrowser;
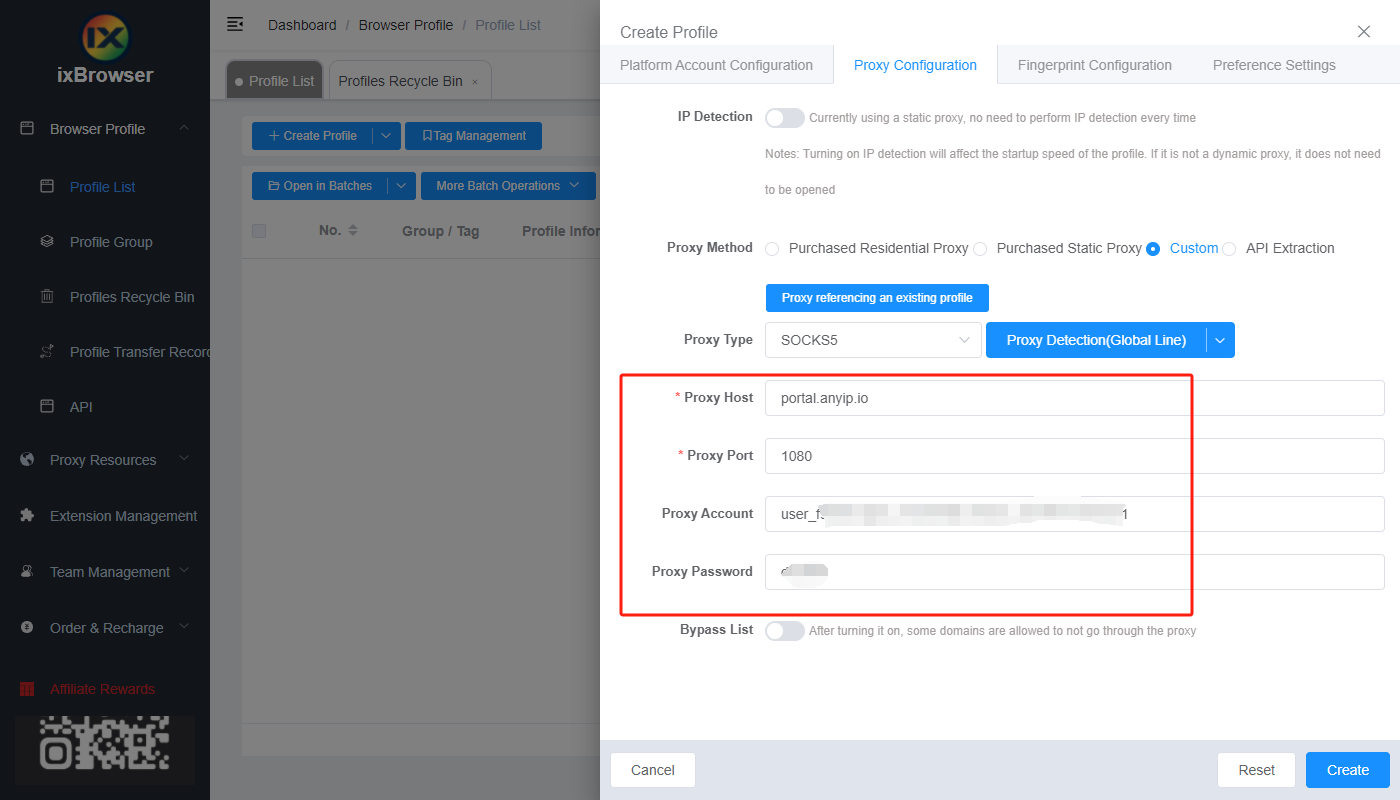
Click proxy detection, once is passed, you can click “Create” button to finish the profile creation (if you want to modify the fingerprint, you can go to Fingerprint Configuration page and make modification);
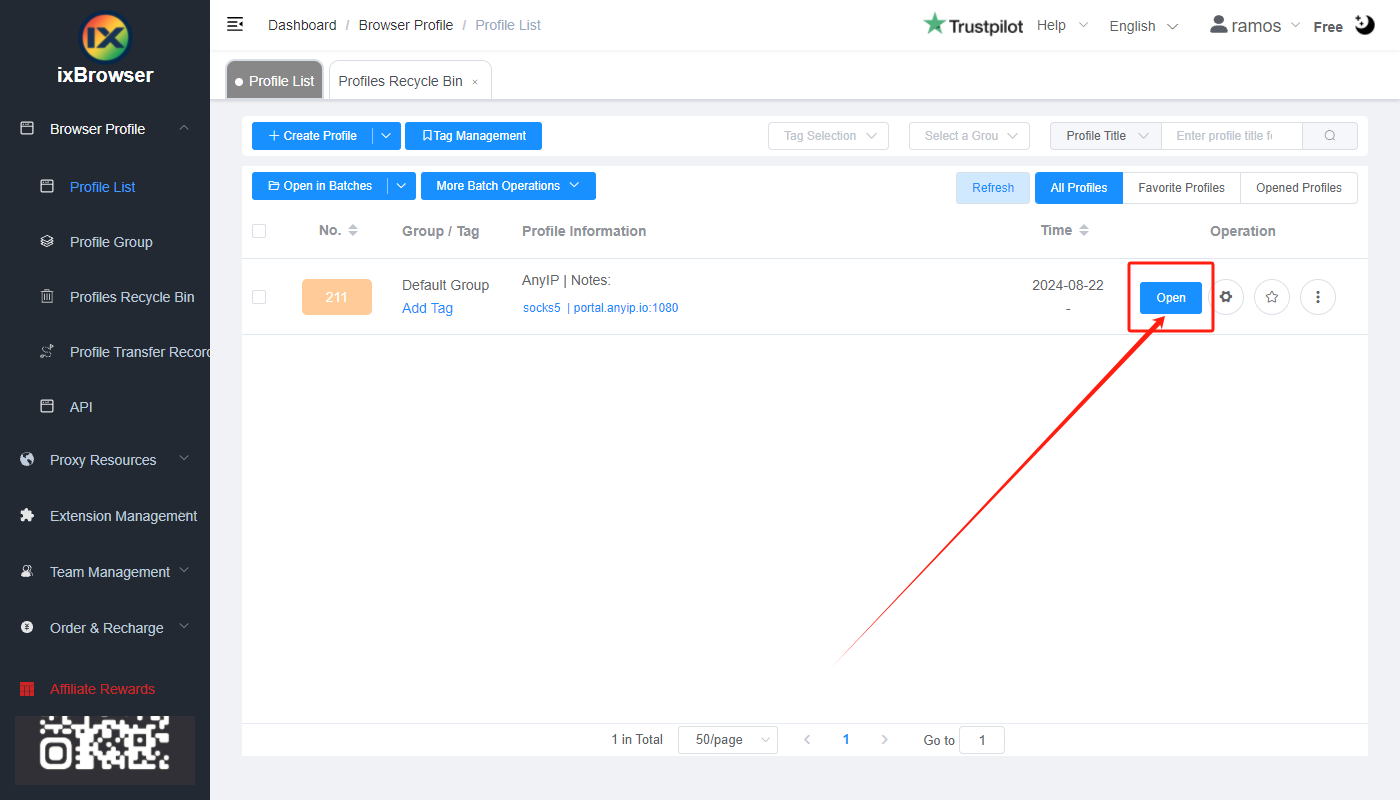
Step 5: in proxy list, find the profile you just created, click “Open” button, and you can start using it!